Showing posts sorted by relevance for query light. Sort by date Show all posts

Sunday, September 23, 2012

Paper House Lights at Hutch

~ Paper House Lights at Hutch ~

1963 Good Housekeeping Cookbook House Light,  21"x 15"x 15",   $185.

The paper house light has been something that has always received a great deal of attention both here in the shop and on line. I remember when I first posted the image below on the internet. It was everywhere in no time. The exact light pictured below was featured on an episode of "Dear Genevieve" on HGTV a year ago and I sadly have not seen it yet.  They are for sale in the shop and I still plan on making it a DIY kit at some point but for now the workshops that teach others how to make the light are what's popular.  To see the current schedule of hutch workshops just click on "workshops" on our blog's main page.

~Sold~

Oh the shadows.....  If you have a dark space to hang the light, like a corner close to 2 walls, you take full advantage of it's shadow casting abilities and magic.


World Atlas House Light,  15"x 13"x 13",   $160.

This light is made out of a old World Atlas. You may be able to locate your place in the world on one of the houses.  The paper is a little thicker and not as translucent compared to the cookbook lights, but it has soft color pallet of blues, greens, and yellows.


Gail, one of my favorite workshoppers has taken this class twice and created two beautiful lights.  Both creations were very thoughtful.  The first repurposed maps that were specifically places that her daughter had been.  It was a graduation gift.  The second, a detail shown below.  Was machine stitched pages from "Pride and Prejudice" a favorite of her daughter.  Another gift.  It's obvious that she loves her daughters a great deal and  I'm sure they love their special gifts from mom.


So don't you want to check out the upcoming workshop schedule and sign up to make your own paper house light now?  Just go for it!

Sunday, February 12, 2012

Jar Light Workshop

~ Jar Light ~

Another one of our upcoming workshops this month is the "Repurposed Jar Light".  With a lidded jar, a  cool old tin, and some lamp parts we will assemble an ultra cool table top light.  The vintage tin is for you to bring along but we supply all the rest of the materials needed for the project.  the size of the light is determined by the jar and tin sizes.  This is a definite one of a kind studio light and hutch is a fun place to make it. 

When: February 24th, from 2- 4pm.
Where: At Hutch in La Conner.
Cost: $45. Light Kit Included

For more info or to sign up contact Chris at Hutch:
#360-399-1223


Friday, January 7, 2011

More on the Light Post.

I had to add the very latest addition to the light of hutch.  Hung it just this morning in fact.  It is a pendant style light comprised of 33 paper houses made from vintage 50's cookbook pages.  They hang with thread from a spiraling wire support.  It sell for $200. and is an in store pick up item only.  The shadows cast by the house on the surrounding walls are amazing.
Last but not least is one of the really fun project kits at hutch.  It is a night light that is made from repurposing a pint milk carton, paper paint sample cards, and old 35mm vacation slides.  I call it "My Vacation Home Night Light", because when you go to bed at night you can turn this on and dream about getting away to that perfect vacation spot.  Lovely thought isn't it. "Night light Take me away!"
The templates and plans for building your vacation home sell for $10.  
Give me a ring to order> 360-466-2303 

Wednesday, January 5, 2011

Lights of hutch

It's fair to say that the lights of hutch studio are quite unique.  Look up, down, in, or out and you will notice many interesting pendants, lanterns, shades, and tea lights.  Not all are for sale but some are.  The porch light (pictured above)is one of the NFS examples and it is the first light you see as you enter our shop.  An original fixture to the house that I would date to approximately circa 1900.
The next two lights are for sale at the shop (call for details).  To the left is an inverted colander lamp and to the right a "Newman" light.  I call it a "Newman" because it is made from a repurposed "Newmans Own" sauce jar.  I collaged old newsprint and paper cut-outs onto the glass and then applied an amber tinted finish.  They sit inside one of our hutches.
The two most dramatic fixtures in the studio are the "Red Spiral Parisol" and the large "Chinese Bird Lantern". The parisol is hand painted and the Chinese lantern has collaged bird imagery in the tinted glass panels. Don't forget to look up or you might just miss these stunning objects of illumination.
The last lights pictured are two examples of a "childlike magic".  the tiny 2 1/2 inch house made with old book pages glows from the warmth of a battery operated tea light. The "Squirrel House" that hangs on the wall (pictured here without its roof), also has a battery operated light that shines on a paper cut image of a squirrel in an oak tree.  I almost get more excited about the shadows that the cut out casts on the back wall, but "Shadows" are another blog post entirely.


Give a call tho the studio if you would like more information about any of the lights in the post.  I will try my best to shed some light.  #360-466-2303

Wednesday, March 30, 2011

hutch Idea of the moment

~ DIY Tulip Tea light ~


I'm always thinking of different ways to use these little battery operated tea lights around the shop.  They just make the perfect little warm touch here and there.  Since the Skagit Valley will soon be blooming with vast fields of tulips I thought a little tulip light would be well suited to our studio.  Best of all it's a repurposing project that utilize all those old magazines that collect all over the house.


Step #1- Collect magazine pages that have a certain color (your choice).  I'm making pink tulips.  Also tear out a little bit of "green".


Here is all that you need to make your tulip light.   Step #2-  With scissors cut the pink petal shapes approximately 2 x 3 inches.  You can do a straight cut along the base of the petals now or after they are taped together (your choice).  I also cut 2 or three thin leaf shapes approximately 1/2 x 2 1/2 inch.


Step #3- Using a pencil or dowel curl the petal pieces starting at the top of the petal.


Step #4- Place the petal pieces in a row 5 inches in length overlapping them slightly.  Place the green leaf pieces on top.  I hold them in place with a pencil.  I first made my strip 5 1/4" long but learned that it only needed to be 5".


Step #5- Using satin finish invisible tape, secure all petal and leaf pieces together along the bottom edge.  If you didn't pre-trim the bottom edge previously do it after this step.  Step #6-  Leave a slight overhang of tape at each end and wrap around the side walls of the tea light. 


Turn on the light and happy spring!

Friday, February 17, 2012

Paper House Light Workshop

~ Paper House Light Workshop ~

It was cold and rainy outside today, but inside Hutch it was warm, cozy, and full of creative activity.  The second workshop devote to the spectacular Paper House Light took place in the center room.  Book pages were carefully selected and then folded and formed into delicate houses.  By the end of day as it became darker outside, the room illuminated with the glow of these lights.


Normally in the 3 hour time frame of the workshop we can complete a 12 house light similar to the red one pictured above or the cream one below.


But if you are very fast and ambitious you may want to tackle a big light like the first one pictured or the one that was recently featured on the HGTV design show "Dear Genevieve".


So if you like cutting and folding fun paper and uniquely fantastic lights give hutch a call to sign up for the next workshop.  There will be one on March 14th and one on April 11th. 

Saturday, July 16, 2011

Colander Light

 ~ Colander Light ~
Sometimes you can have an idea, create it, and later on see a similar idea made by someone else.  I've learned over the years that it is always better to then take your idea further.  It's a way of creatively pushing yourself.  Recently I picked up a magazine and discovered an article on lights made using kitchen colanders.  I had made a couple for the shop a year or so ago that seemed very similar.  HTe very next day I took down the one I had in our kitchen and began turning up the creative dial.  I added fork fringe which I had been thinking about doing but this article sealed the deal.  I also suspended it with a cool old twisted metal plant hanger from a bent spoon bracket on the ceiling.  The change was much needed.  Before it was hardly noticed and now it can't be ignored.


One of the things I like about the forks is that the light takes on almost organic jellyfish quality.  If jellyfish were made out of kitchen wares that is.  I also staggered the fork lengths to create a wavelike edge at the bottom.


In terms of function things were much improved as well.  Before it was so high up on our tall ceiling that it offered little light to a dark space.  Now it is centered right above the table and illuminates the center piece beautifully.  This light is priced at $300. Give me a call to order 360-466-2303.

Thursday, February 17, 2011

A fun little idea.

~Paper Lantern House~
Here's a fun and really simple idea.  Take a photograph of your house and print it horizontally on a standard 8.5 x 11 inch sheet of 20# weight paper.  Cut a straight edge along the bottom of the image and at the top cut along the house's roof line.  loosely wrap the house around a soup can slightly overlapping at the back.  Using a couple of pieces of satin transparent tape secure.  Now in order to make this a safe lantern you need to use a battery operated tea light.  You can find these little 1 1/2" lights pretty easily in craft stores (especially around the holidays).  NEVER USE A CANDLE!  Paper + flame = fire.  Simply place the paper house cylinder over the tea light and your house is glowing with warmth.
This picture was taken in the dark, but in a dimly lit space with a fresh battery in the light the house gives of a nice soft glow.  I sell these "hutch studio" lights at the shop but it's just one of those free ideas that people leave the studio with.  To make a "move" easier on a child a warm light of the house that they grew up in could be a great comfort.  If you use this idea in some way I would love to hear about it and post a picture if possible.  Send photos and messages to me at the studio -chrisptheiss@gmail.com
Have fun with the idea!


Sunday, February 20, 2011

Illustrated Drum Shades

~ Illustrated Light Shades ~
One day I was organizing one of the rooms at the studio used to store just about everything and sitting on top of a precarious pile of old lamps were a few newer looking drum shades.  I'm assuming someone had bought them with a plan, but had abandoned the project.  Inspired by a children's book that my wife and son had recently given to me as a gift I decided to use the simple white surface of the shade as if it were a wrapped piece of paper to draw on. I first did a very light pencil sketch followed by line drawing with a fine point black sharpie marker.  Subtle color was added with watercolors.
Because some of the themes at the studio incorporate children, nature, and animals, that's what I used as subject matter.  The first lampshade pictured a little boy and a bird, a little girl and a squirrel, and trees with an acorn.
It really made a sweet light for a nursery or small child's room.
Well, someone else thought the same thing and bought it.  The room got dark after that so I had to come up with another one quick.  It was early spring and the mole hills were treacherous in the back yard so I thought Moles and Daffodils would be a great combo. Oh yeah, and a little girl and boy too.
I love a challenge, and to make a mole cute is exactly that.  Can you picture this little dude doing a little "Caddyshack" dance?  This lamp is still the center piece in our "sweet room" at the studio.  It retails for $150. call 360-466-2303 or stop into the studio to see it in person.

I'm thinking the next one is going to have "pink tulips", bunnies, a little girl, and a little boy.  What do you think? Should the little girl have curly red hair?
I also want to share a secret with you.  The magical ingredient that I add to so many things that I make in the studio is............


COFFEE!!!
I put it in myself as well.
It adds the right warmth to white and tones down colors that are a little too bright.  Give it a swirl!  No cream or sugar.


Sunday, December 4, 2011

Paper House Light Workshop

~ Paper House Light Workshop ~


Do you have any old books, magazines or photos that are taking up space somewhere and you never get the chance to appreciate them.  Why not sign up for a hutch workshop and turn them into a magical light that you can adore every day and night.   These hanging house lights are aprox. 7 inches tall and 9 inches wide consisting of 12 paper houses.  It is a 3 hour workshop and the lighting kit is supplied for you.  All you need to bring is fun old book or magazine pages that are at least 9 inches wide and 7 inches high to fit our die cutter.  *Thin paper is best for it's translucency.  The age level is 16 and above.

Date:  Saturday, January 7th
Location:  Hutch in La Conner
Time:  12pm-3pm
Cost:  $40.

For further questions or to sign up please contact:

*Note these paper house will be available for purchase soon in our etsy shop.

Saturday, February 5, 2011

The Windows of Hutch

~ The Windows of Hutch ~
I have to say that of all the things that I make at the studio the window coverings are my favorites.  There seems to be so many levels on which to appreciate them.  You are drawn to them from outside the house and that experience changes from day to night.  from inside the experience is different but the light from day to day and day to night always effects how the look.  The shadows that are created by the daylight passing through the cut designs are always exciting to see.  The above detail is from the spring and summer  window covering I call "Rainflowers" .  It is a paper cut using thin white butcher paper.  I like the way the paper curls at the edges and gives the design some dimensionality.  The cascading flower and leaf pattern has a second element of dangling paper raindrops painted grey blue that fall from a cloud valance along the very top edge.  This rain can be seen silhouetted in the photo below. 
 "Rainflowers" 
The "Rainflowers" window covering is available as a paper cut kit.  The full design measures 34 inches wide by 67 inches high and can be adjusted to fit most window openings.  The cost is $28. and will be in our blog shop soon.
 "Winter Window"
Our "Winter Window" is my favorite.  The design is a northwest woodland winter scene comprised of trees, snow, mushrooms, a bird, and a squirrel.  It is cut out of quilter's batting which has a translucent quality that allows for beautiful lighting effects when double layered.  Pictured above is single cut out layer that has great shadow casting qualities. This fall I changed them slightly by dyeing the cut out layer dark brown, giving the design greater contrast without the help of backlighting.

In our "sweet room" which has a lot of light aqua and soft pink colors I dyed the solid piece of batting a very soft pink and left the cut out layer the natural cream color.  I also flipped the image to create a balanced overall design for the double but separated windows in this nook.
I often tell customers about the first time I went outside the studio after dark, with the lights on inside.  It looked magical and felt that way too.  It was that tingling sensation throughout the whole body that you only experience on rare occasions.  It's like when you hear a singer hit that amazing note or see a dance performance that leaves you breathless.  Anyway, it was cool.   This is a photo from last season before I dyed the cut outs brown.  It's even better now.  In the fall and winter I set the upper room lights on timers so everyone walking or driving by after dark can experience this magic for themselves.  Remember Morris Street in La Conner, Washington.   Take a drive!
Like everything at the studio the window coverings are totally made by hand.  The idea begins as a free hand line drawing that gets hand cut into a template.  The template is then placed onto fabric, the design is traced, and then the fabric cutting is done.  These windows are well worth the labor involved in making them, but don't take my word for it, come on by and see them for yourself.

"Winter Window Design"

Pictured here is an example of a completed double layer winter window with a dark brown cut out top layer that was hand dyed.  This exact design measures 33 inches wide by 67 inches high and can be cropped to suit most window sizes. 


The cost for the winter window pattern is $24. and will also be available in our blog shop very soon.  Until then just give me a call at the studio if you have any further questions or to order.  360-466-2303.


Wednesday, January 19, 2011

Shadows of hutch Part 1

There's something about shadows that has always excited me.  Maybe it's the fact that they are all about the moment, destined to move or fade away with the light.
Since starting hutch studio, I've noticed some really amazing shadows.  I think that it's result of the perfect combination of great natural light through many windows with interesting window coverings and objects within the space.  In this post I want to share a few of my favorites.  The first is a shadow of flowers and leaves on the floor on a sunny morning in May.  It was our "Rainflowers" paper window covering creating the pattern.


This shadow was cast on the wall next to a wooden stand that had a small standing plush bird wearing a hat and carrying a treasure in it's beak. Oddly, in the afternoon of the day the picture was taken, someone purchased the bird.  It's not the bird in this lonely shadow anymore.

This was a shadow that was brought to my attention by a visitor to the studio.  It's a squirrel climbing down a tree branch from the hutch "winter window" pattern that hangs in the front door window.  This happens during the morning hours when the sun shines.


We definitely have some great old dress forms in the shop that we use for display.  This is the shadow that a wire mesh dress form that stands up against a wall in our side porch.  I liked the contrast of the linear weave pattern against the organic contour of the dress form.


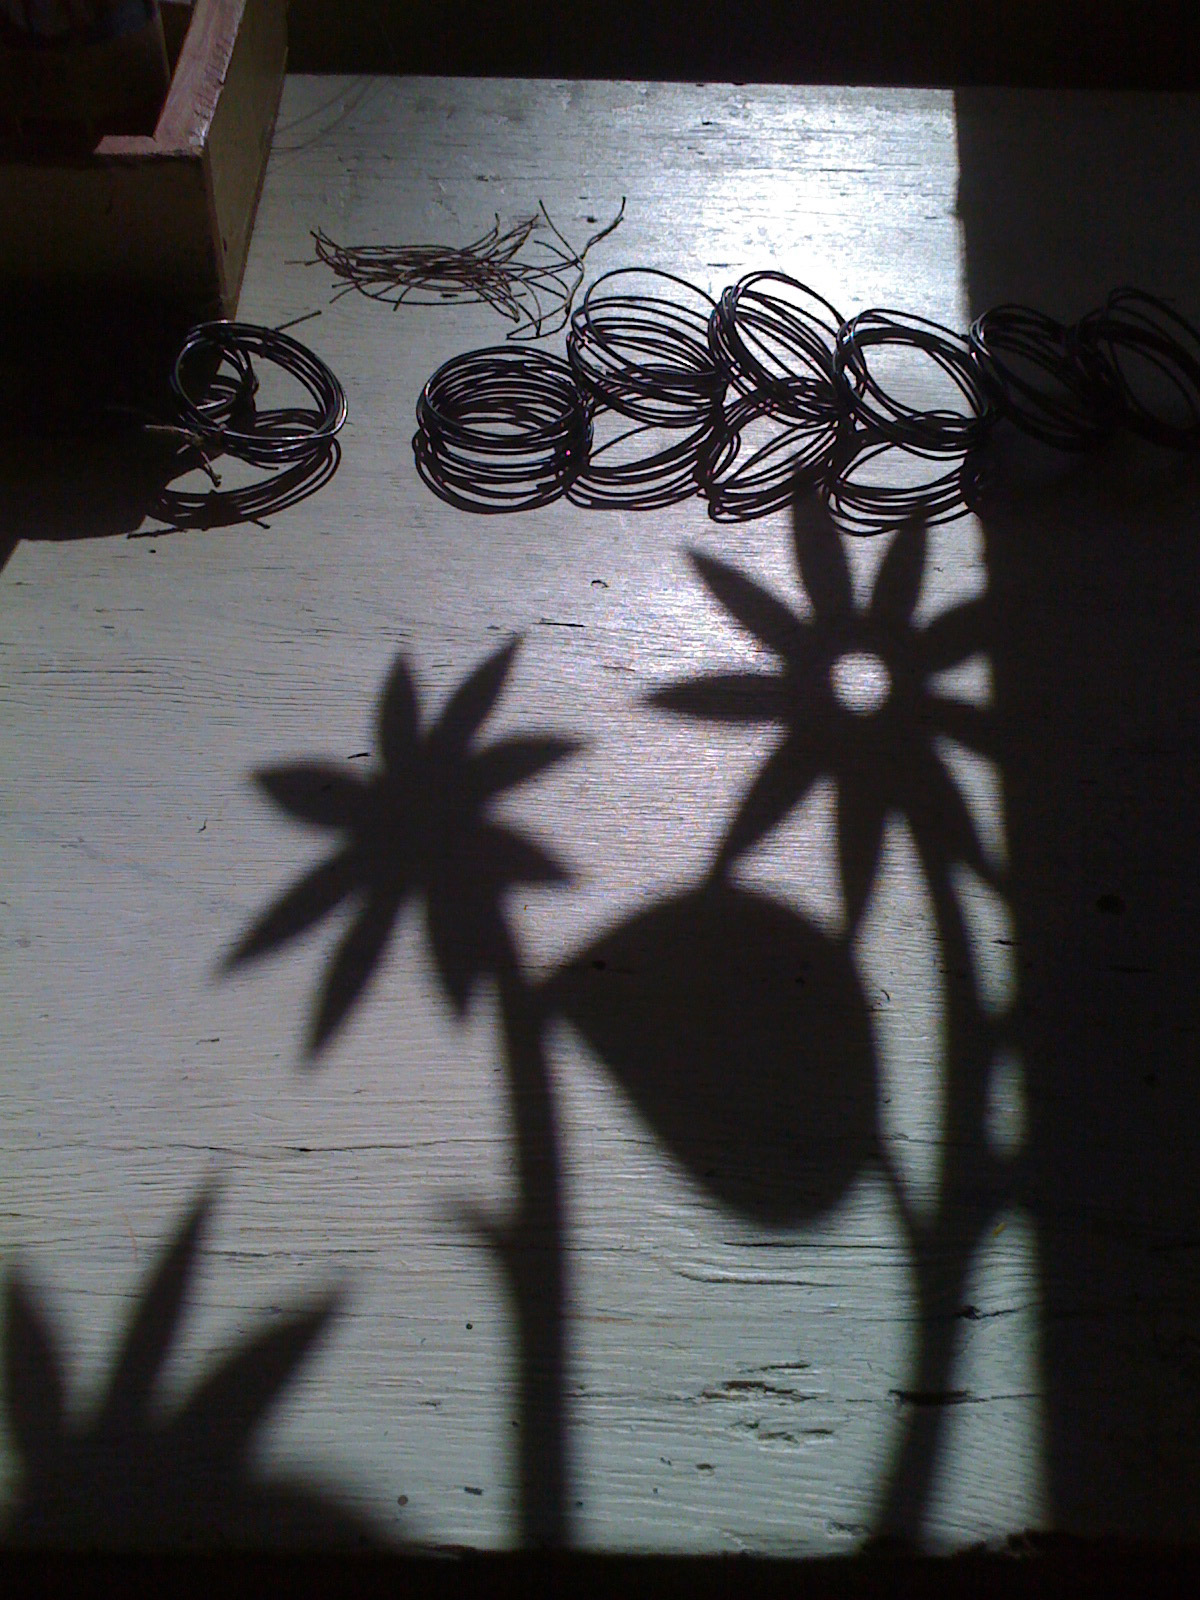
One sunny morning as I was beginning the hutch day, I looked down at my work table and there it was.  Right under my coiled wire, shadows were cast from a small paper cut hanging in a window.  Flowers standing almost as they were growing up from the table's front edge.  I was tempted to grab some paint and a brush and quickly paint the shadow onto the table.  Maybe that's a future hutch project "Shadow Paintings".
  
If you stop by the studio for a visit you may be able to view one of these shadows in person.  Or maybe you can discover a totally new one.  Stay tuned for more shadow pictures to come. I'm curious which one of these shadows was your favorite?


Sunday, January 1, 2012

Hutch in the New Year.

~ Hutch in the New Year ~

We are very excited for the new year at hutch.  It is certain to be full of creative ideas and activity.  Workshops, classes, and demonstrations, designed to capture the imagination and interest in people of all ages.  Expect to see classes in making all sorts of fun things and the processes will vary from baking to sewing to paper sculpting.  And don't worry the whirligig creating will be a constant workshop in the new year.  Here is the initial schedule for hutch classes in January and February 2012.  I'm sure we will be adding more into the mix so stay tuned into the blog for any fun additions.

~Hutch Workshops in January & February~

There are so many fun and creative workshops at Hutch these days it’s hard to list them all but here goes……..

Whirligig Making -           Sat. Jan. 14th               Sat. Feb. 11th
                                             Sat. Jan. 28th               Sat. Feb. 25th
11:30am- 4:30pm
cost: $100.

Paper Houses-                       Mon. Jan.9th                           Mon. Feb. 6th
                                             Wed. Jan. 18th              Mon. Feb. 27th
                                             Mon. Jan. 30th
1:00- 3:00pm
cost: $20.

Paper House Light-                Fri. Jan. 21st                         Fri. Feb. 3rd
                                                                                 Fri. Feb. 17th
12:00- 3:00pm
cost: $40.

 Sweet Little Tweet Birdcage -
                                             Fri. Jan. 6th                          Wed. Feb. 8th
                                             Mon. Jan. 23rd               Wed. Feb. 22nd
1:00- 3:30pm
cost: $30.

Origami Bird Mobile-              Wed. Jan. 4th               Wed. Feb. 1st
                                             Mon. Jan 16th                Wed. Feb. 15th
2:00-3:30pm
cost: $45.

Related Posts Plugin for WordPress, Blogger...